In the Incident page, you can find the list of all the incidents along with their states and the attack tags and attack categories associated with them. You can Resolve, Re-open, Close, Comment on, and View the Data for these incidents. Additionally, you can send incident notifications for investigation if you have configured the Manual notification trigger for the corresponding alert rules.
Once appropriate action(s) has been taken on a particular incident, you can Resolve it.
If you feel that an incident was not resolved even after it was closed, you can re-open it. Find the incicdent in the list and click Re-open.
After an incident is resolved and needs to be close, you can close it by clicking on the Close option. Once an incident is closed, it is not shown in the incident page. However, it can easily be retrieved using the Closed option in the Status filter.
You can post comments on the incidents seen in the incident page. You can also track the actions taken over the incidents via the comments.
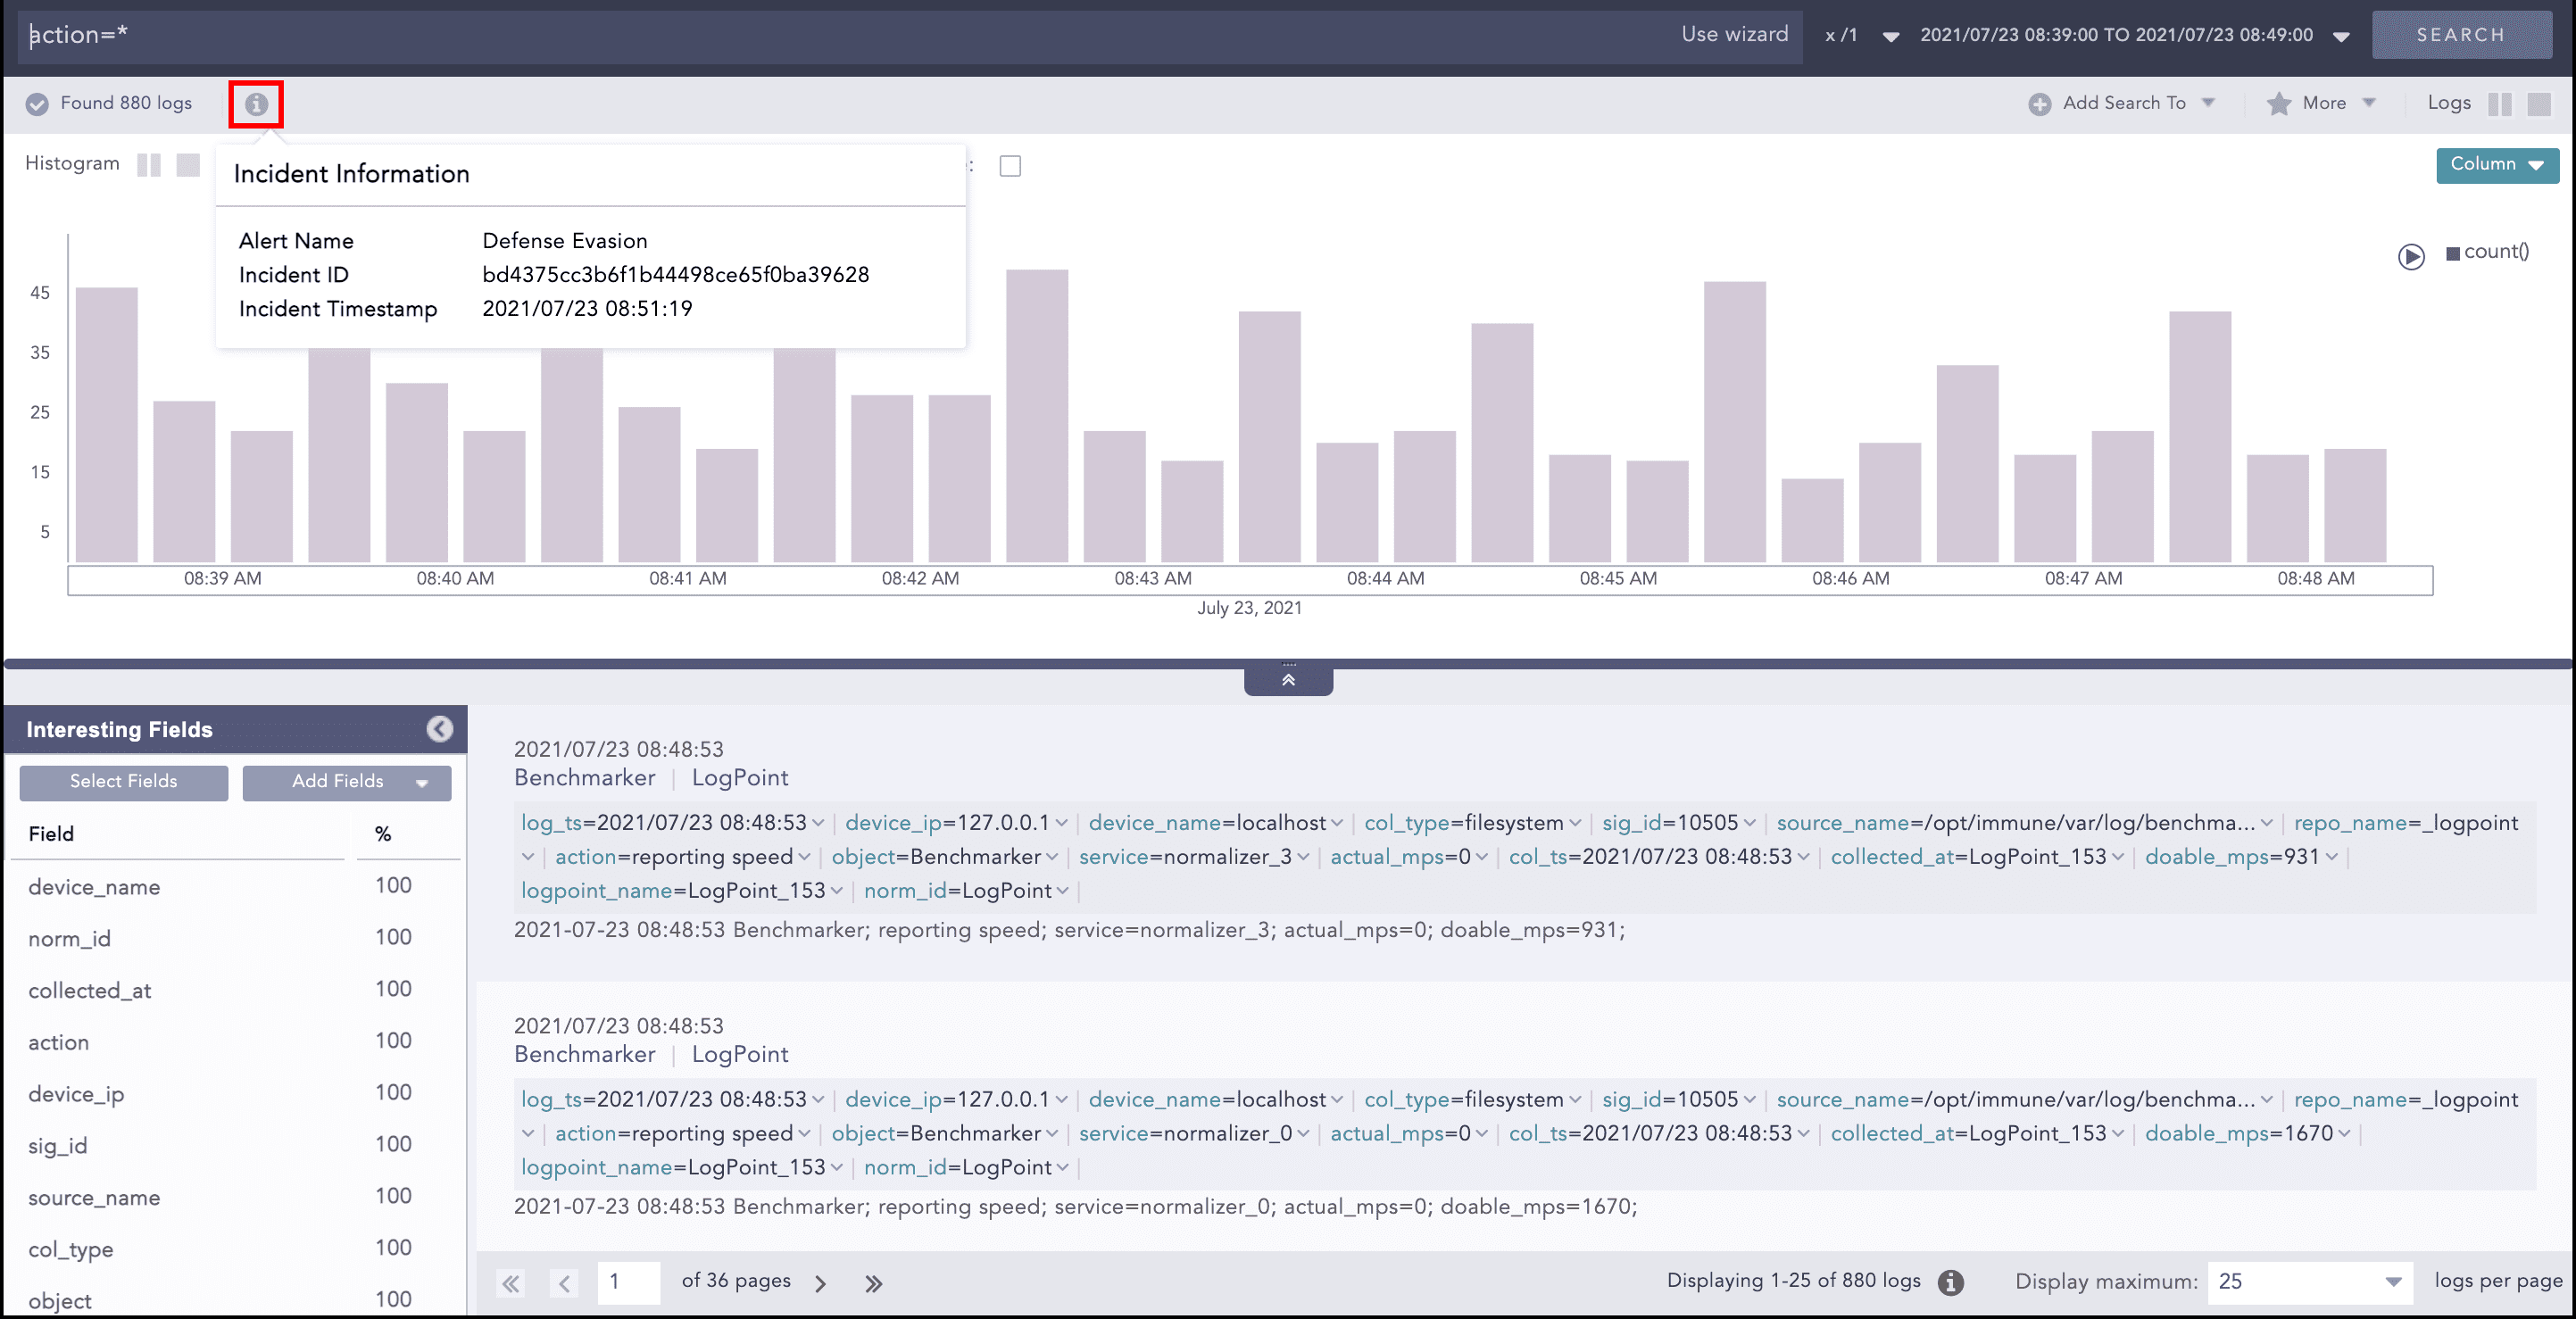
The View Data option directs you to the search page and shows the log messages that triggered the incident. You can click the Open in new tab ( ) icon to view the incident data in a new browser tab.
Note
You can view the incident information like Alert Name, Incident ID, and Incident Timestamp from the Incident Info ( ) icon on the redirected tab.
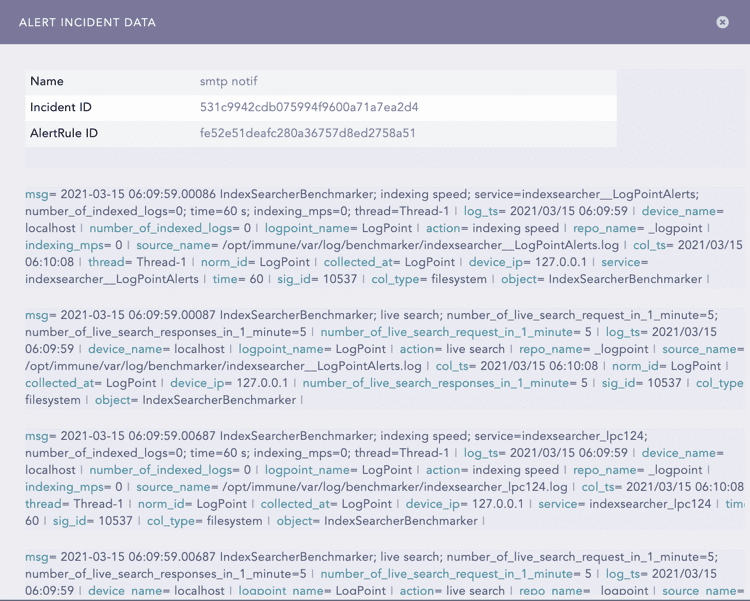
Alert Incident Data
The Incident Data option opens a pop-up panel to display the data of the incident in the format specified in the Incident Data View panel while creating the alert rule.
Note
If the format was not specified in the Incident Data View panel while creating the alert rule, the Incident Data panel displays the logs of the generated incident.
You can monitor each incident’s status using the Incident ID, which is a unique ID of an incident. It is constant for each incident. You can also view the corresponding AlertRule’s AlertRule ID and search for all the incidents associated with an alert using the AlertRule ID.
Note
An AlertRule ID is only available in incidents generated from an alert.
Alert Incident Data
The Assign to me option assigns the incident to you (the user who is logged in).
The Send For Investigation and Re-Send For Investigation options let you manually send incident notifications for further investigation.
Note
The Send For Investigation and Re-Send For Investigation options only appear if one of the notifications has been set to trigger Manually in the corresponding alert rule.
When you click Send For Investigation, only the notifications configured with the Manual trigger for the corresponding alert rule are sent.
Incidents generated from Search, Dashboard, Search template, and UEBA can also be sent for investigation manually. The Send For Investigation and Re-Send For Investigation options are not available for these incidents. You can use the Send Selected For Investigation option under the More drop-down to send the incident(s) for investigation.
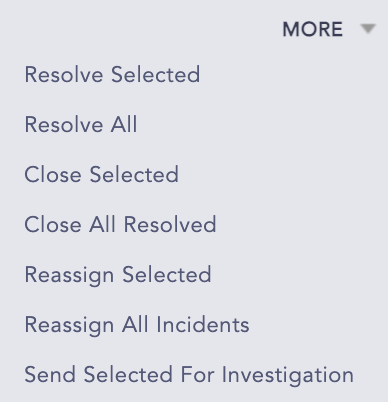
The More drop-down near the top-right corner of the Incident page lists additional actions.
More Drop-down
The Resolve Selected and Resolve All options let you resolve multiple incidents at once.
The Close Selected and Close All Resolved options let you close multiple incidents at once.
Note
The incidents cannot be closed without being resolved first.
The Reassign Selected and Reassign All Selected options let you reassign multiple incidents at once. Reassigning opens a window prompting you to select a user to reassign the incidents to.
The Send Selected For Investigation option lets you send the notifications configured for the selected incidents. You can either select a single incident or multiple incidents and send them in an email using the Send Incident(s) for Investigation dialog box.
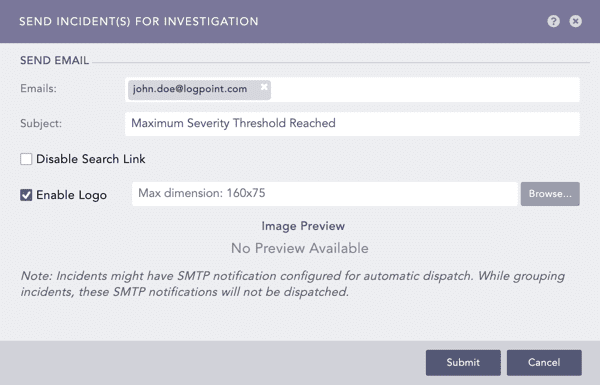
Send Incident(s) for Investigation dialog box
Provide valid email addresses under Emails.
Enter a Subject.
Select Disable Search Link to remove the search link in the email. The search link redirects you to the search page of the Logpoint instance from which the email notification is configured.
Select Enable Logo if you want to include the Logpoint logo in the email notification.
Browse for the image in JPG/JPEG format if you want to provide a custom logo. The maximum dimension for the custom logo is 160*75.
Click Submit.
Note
If you do not want to include the Logpoint logo in the email, deselect Enable Logo and click Submit.
Any pre-configured settings for email notification are replaced with the configurations set in the Send Incident(s) for Investigation dialog box for the particular instance.
You must configure the SMTP service before sending email notifications.
Only the incidents corresponding to the alert rules configured for manual trigger in email notification are sent in email.